Having an organized garage and shop is essential in my opinion. I like stuff in its place and quickly accessible.
We’ve all dealt with jumbled yard tools stacked in a pile. Or a 15 minute search for a tool that you need for 5 minutes.
Then there are the aesthetics. I prefer a work area that looks nice.
Slatwall and Pegboard Similarities
Slatwall has utility in common with traditional pegboard.
It uses the vertical space effectively. If you think about the surface area available on walls vs. under workbenches, etc, it’s a big multiplier. For example, on my average 12 ft. high garage and shop ceilings, using 8 ft tall panels I’m able to utilize 60 linear feet of walls, totaling 480 sq-ft of storage. Contrast this with roughly 30 sq-ft usable under a typical workbench.
Organization of items is flexible and easy to re-arrange. You have instant access to the tools you use frequently. Both are low cost.
They both get things off the floor, making it easier to clean.
Slatwall Advantages
But slatwall offers a number of advantages over traditional pegboard.
It is far nicer looking. You can choose from a wide variety of colors and finishes to get the look you want. Choose not only paint grade, but even wood grain and simulated metal finish.
Slatwall is stronger. It lies flat to the wall, so doesn’t flex, and supports mounting of far heavier items.
Slatwall offers a wider range of mounting accessories. Because it is used heavily in retail, you can get a mount for just about everything. Choose from a variety of hanger styles and lengths, shelving, baskets, bins, etc. I even got one for my basketball.
Personally, I’m surprised it’s not more ubiquitous in the garage. About the only downsides for wood-based panels is they are heavy, typically require freight delivery, and it’s a 2 person job for installing.
Slatwall Selection
I spent a lot of time researching various materials, standards, and brands.
PVC was undesirable as it is more expensive (3-5x more than wood based) and I was concerned with the typical problem of static and dust collection as with any plastic product. Then there is the whole durability question with exposure to sunlight over time. That said, it is a popular choice.
Distributors will often re-brand items, making it difficult to determine the actual specs, esp. breaking strength.
I concluded that particle board panels would be more than adequate for my requirements. This is an indoor installation, so avoiding exposure to water was not going to be a problem. Strength-wise, the breaking point is around 30 ft-lbs for a single point load. Considering that most of my items aren’t that heavy to begin with, and mount close to the wall, this provides plenty of safety margin. Aluminum inserts are available to increase strength, but are costly, and depending on the brand, can require factory installation. Lastly, it is very affordable.
As for brand, I chose the Marlite EQ 2000 line of slatwall. They use a higher level of pine content to provide strength equivalent to the MDF series. Grooves are the preferred 3 inch separation.
Panels are available in vertical configuration (4′ wide by 8′ tall) as well. I realized that this is an important consideration for installation. A single panel would be full height for my application. With horizontal panels, I would need to stack 2 vertically. Aligning them is more work. It also turns a 2 person job into a 3 person job (2 to hold, 1 to screw to the wall), with people on ladders handling 90 lb panels…no way.
You can order free samples of all the colors/finishes so you can see exactly what it will look like for your application. I got 10 different types to evaluate, ultimately selecting Stone Grey.
As for the distributor, I went with Store Supply Warehouse. Vertical panels required a custom order, which they accommodated. They also carry a full line of accessories.
It’s best to order extra panels to account for breakage during installation (more on this below), mistakes, and changes in plan. Freight cost is more or less fixed, so order extra.
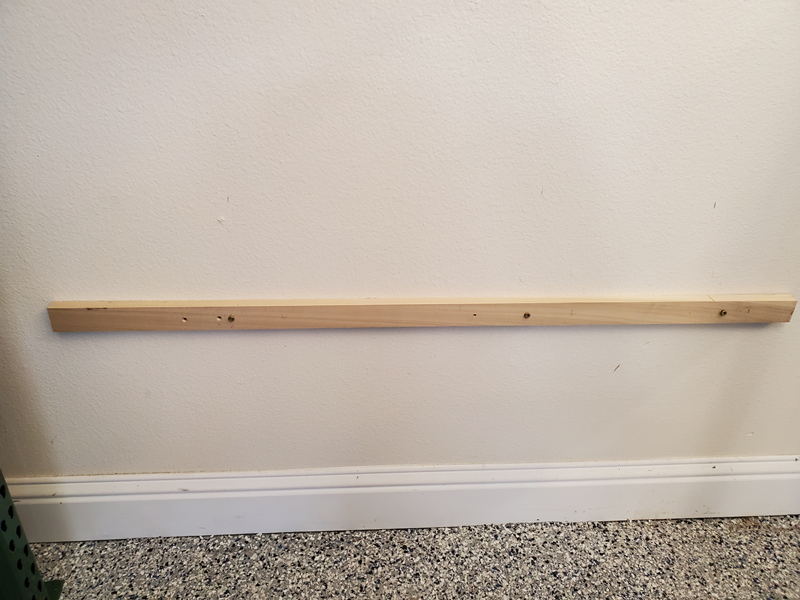
Carrying Jig
One downside with particle board slatwall is it can break during handling. More so with vertical oriented panels. All the grooves make it very flexible and flimsy. If you try and lift up a panel from the ends, it will break. Handling requires care to hold it from the sides, and support the center to minimize flexing. It’s a major problem when you’re trying to lift the panel to a vertical orientation for mounting. So I made a jig that kept the panel from flexing.
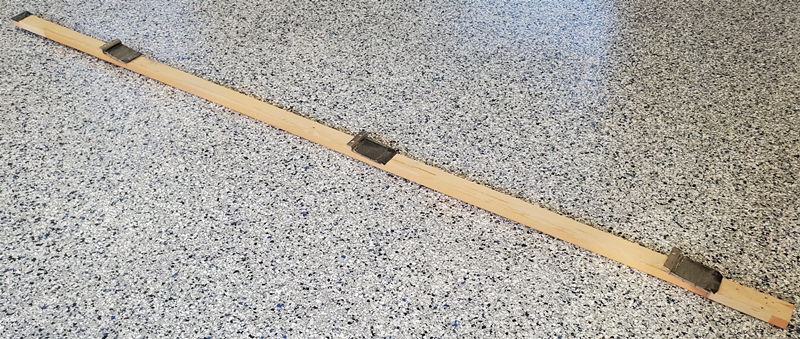
Start with a 6′ long piece of scrap hardwood. You’ll want something stiff. Attach 3 Slatwall Metal Plate Mounts, aligned to the slatwall grooves.
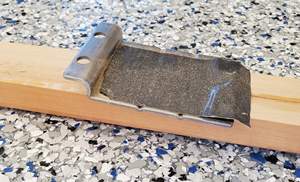
Cover the back with duct tape so that the slatwall finish doesn’t get scratched.
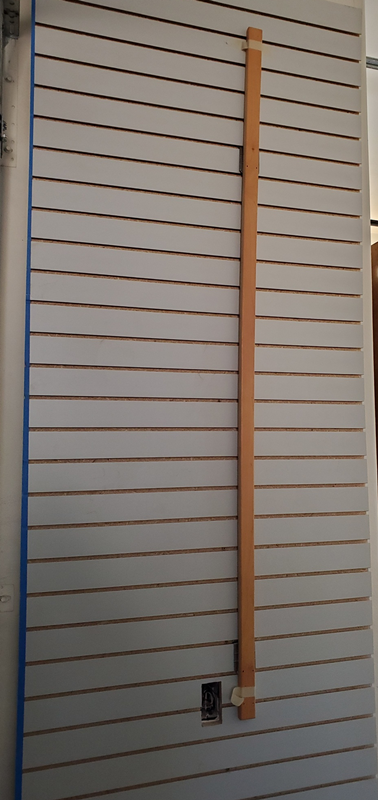
Slide it onto a panel and use masking tape to temporarily hold it in place.
Installing
Materials
The following materials are needed for cutting and installation.
Painters Tape – for cutting panels, to minimize tear-out.
Wood Screws – I used Power Pro 48598 Wood Screws, #9 x 2-1/4″, Premium Outdoor Deck Screws. Plan on a minimum of 33 screws per full size panel.
Adhesive is required to ensure that panels adhere to the wall and remain flat under load from a slatwall mount. After experimentation with a number of different adhesives, I found most were terrible in holding particle board to a painted wall. However, LiquidNails LN-2000 Fuze It was excellent. It provides sufficient working time of over 30 minutes, and outstanding holding strength.
Outlet box extenders are needed to extend wall outlets out to the surface of the panel. I used these Outlet Box Extender.
Thin shims to use for leveling panels. I used small pieces of scrap laminate.
Wall Preparation
Mount a 1×2 rail along the wall for the panel to rest on during installation. Make sure they are straight and level.
Rails will be removed after installation, once the adhesive has cured.
Remove any outlets and switches so that wiring will pass through cutouts in the panel.
Clean the wall surface, removing all dust, cobwebs, etc. Remove all surface protrusions so that the wall surface is flat.
I had one location with a thermostat wire that was stapled to the wall and it was not possible to relocate.
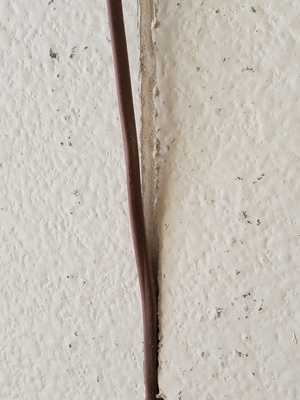
I removed the staples, and used a Dremel to cut a channel deep enough to make the wire flush to the wall.
Note the stud locations. It’s helpful to consider where a row of panels starts in order be optimize them to the stud positions, especially if studs can align well with the edges of the panels, but never fall on a gap between panels.
Adhesive will be applied just prior to mounting of the panel.
Panel Preparation
If required, cut the panel to size first. If you’re reducing the height, do this cut first, so that scrap is a full width piece that can be used elsewhere.
Cutting particle board generates a tremendous amount of dust. Do this outside if you can. The dust is very fine, wear a breather.
To protect the surface to minimize tear-out, place painters tape on the face side, centered along the cut line.
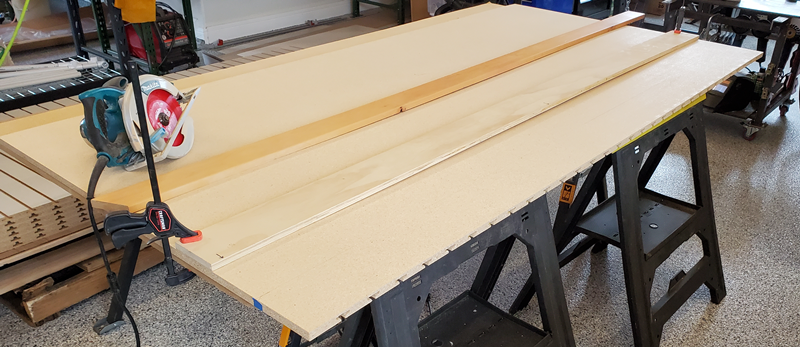
Flip the panel over and cut with a circular saw from the back side. Use a fine tooth carbide blade with a 1″ blade depth. Clamp a straight board to it to use as a cutting guide.
Now do any outlet cutouts.
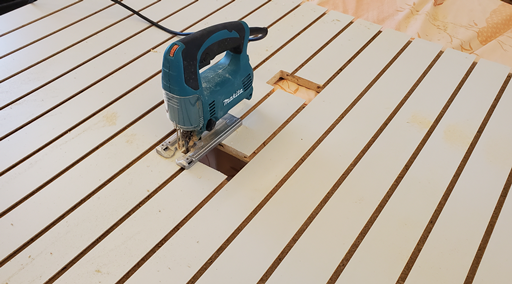
These are done with a jig saw with 10 TPI blade from the face side.
Lastly, based on the wall stud positions, mark all screw locations with a Sharpie, and pre-drill with a 1/8″ bit. Drill every third slot, but make sure to include the top and bottom slots. I offset each column of holes so that screws weren’t all in the same row. Use every stud available to you. Pull-outs typically occur away from the stud attach points, where the slatwall can flex.
Remove all dust from the panel. Start with an air gun, followed by vacuuming, then a wipe down with a rag.
Do a test fit of the panel if it has any cutouts or is a unique size. Insert the carrying jig. This step requires 2 people for a full size panel. Support the top of the panel with one hand to keep it from flexing. Place the panel on the rail and confirm cutouts line up, it lies flat to the wall, and aligns with any adjacent panel. Once confirmed ok, return it to the cut station to lie flat.
Mounting
Apply the adhesive. Apply a liberal amount 1/2″ from all edges, and use an S pattern for the inner area so that beads are not more than 6-8″ from each other laterally. Plan on approximately 30 minutes of working time once it is applied.
Set the panel on the rail. Since the adhesive is now present, take care to only rest the bottom portion against the wall. Align it to butt any adjacent panel. If there is any gap, place shim(s) under the panel to close the gap.
Now one person can press the bottom of the panel so that it stays on the rail, and with the other hand, hold the top of the panel.
Make sure the carrying jig can be removed. If there is not sufficient space to remove it after installation, take it off now.
The other person can begin inserting screws, starting from the bottom. Work your way toward the top. As pilot holes haven’t been drilled yet, I found it easier to start with the center column and set screws part way in, until about half way up. Then return to remove each screw, drill a pilot hole (a second drill helps), and set screws flush to the slatwall slot.
At a minimum, insert screws every third slot. Make sure the top and bottom slots have screws. Complete all the stud columns.
Remove the jig from the panel.
Outlet extenders can now be installed.
Let the adhesive cure for 2 days, before mounting anything to your slatwall and removing the rail.
Results
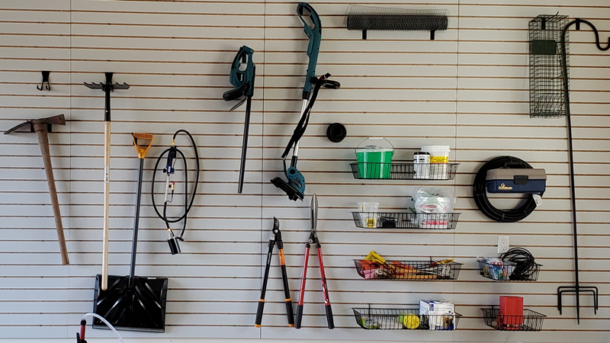
I’m very happy with the results.
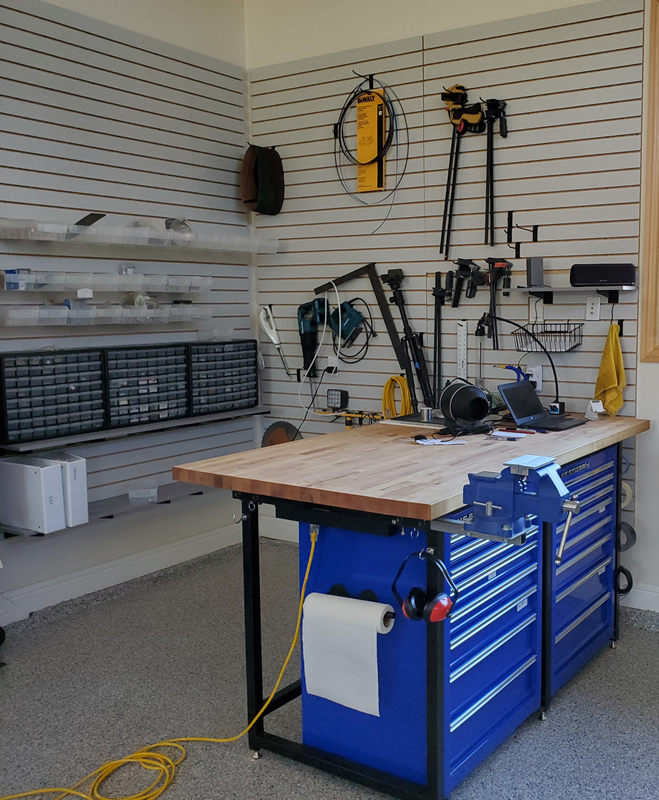
This picture shows a mix of accessory mounts, including shelving, hangers, baskets, and bins.
I ended up using two different accessory stores to cover the range of items needed:
– KC Store Fixtures
– Store Supply Warehouse
Subsequent posts will cover some of the custom slatwall mounts I’ve made.