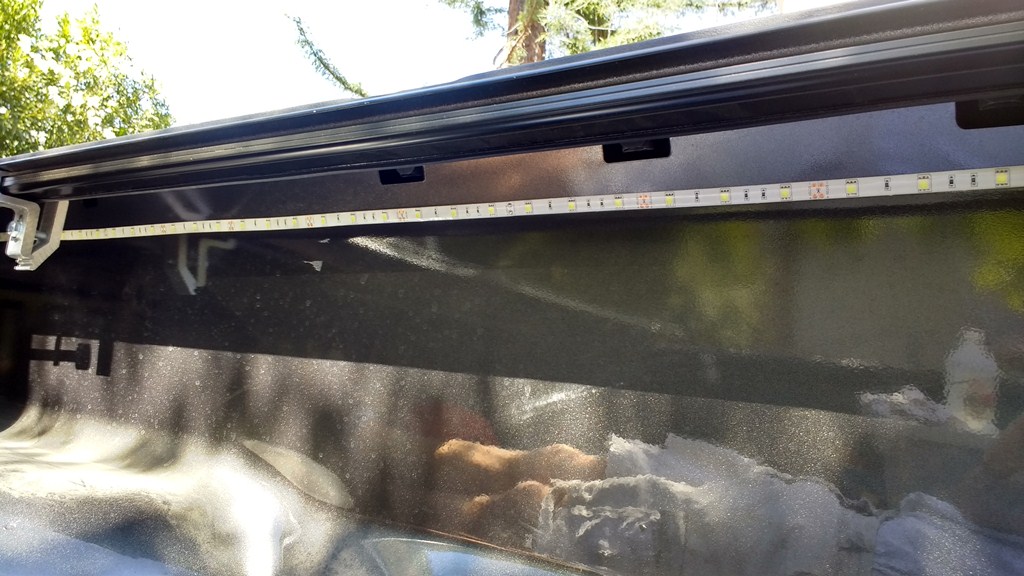
I frequently need to load and unload gear from the back of my truck when it’s dark out, whether middle of the night or well before dawn. I have a bed cover (Undercover) on it, and it’s dark as heck in there. I don’t want to hassle with a flashlight and the inevitable third hand needed. So, why not install some lights so I can see what I’m doing? The good news is it’s not expensive at all, and just a couple of hours of work.
Here’s what you need:
- LED Strip Lights
- Inline Fuse Holder
- 18 gauge, 2 conductor copper wire
- 1/4″ Plastic Split Wire Loom
- 2.1mm Power Cable Extension
- 12v Switch
- Black Zipties
Installing the LED Light Strip
Cut the light strip to size to fit one side of your truck bed, e.g. 5-6′. Clean the bed surface well, with a final wipe with alcohol. To attach the led strip, I started at the back, peeling the adhesive backing off bit by bit as I attached it to the metal surface. I chose to mount mine at a level where the leds would angle down somewhat.
It’s important to let the adhesive cure for a few hours before making further connections, otherwise the strip may come off.
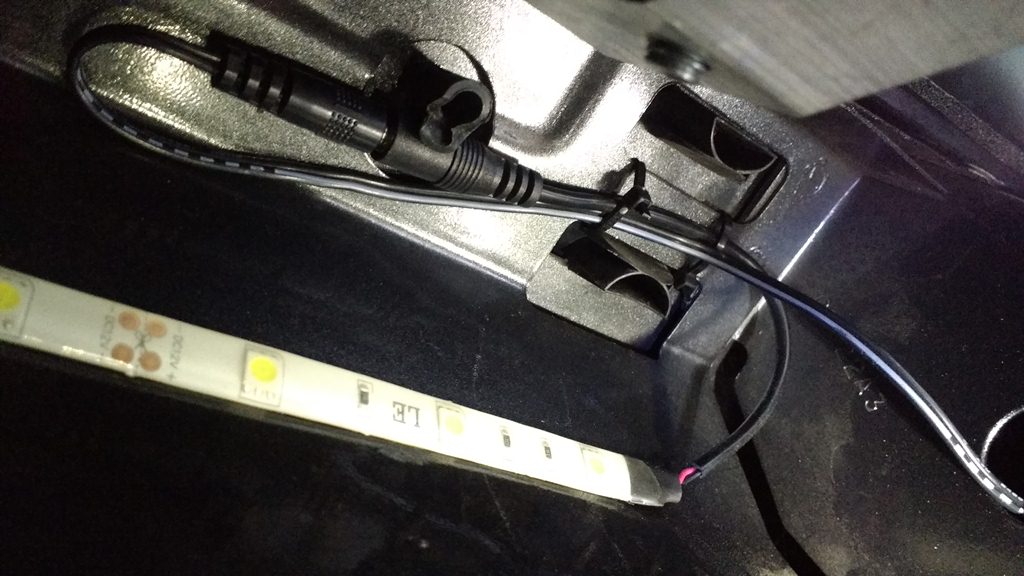
Now zip tie the power cord to provide strain relief.
For the other side, first you’ll need to attach the other included 2.1 mm power cable.

The clip mount that comes with this kit seriously sucks- it doesn’t make a good connection without some jury rigging. I had to bend the leads down and it’s too fragile for my liking. You may want to solder it as well. This is the only difficult step in this project. Make sure you test it before mounting it.
12v Harnessing
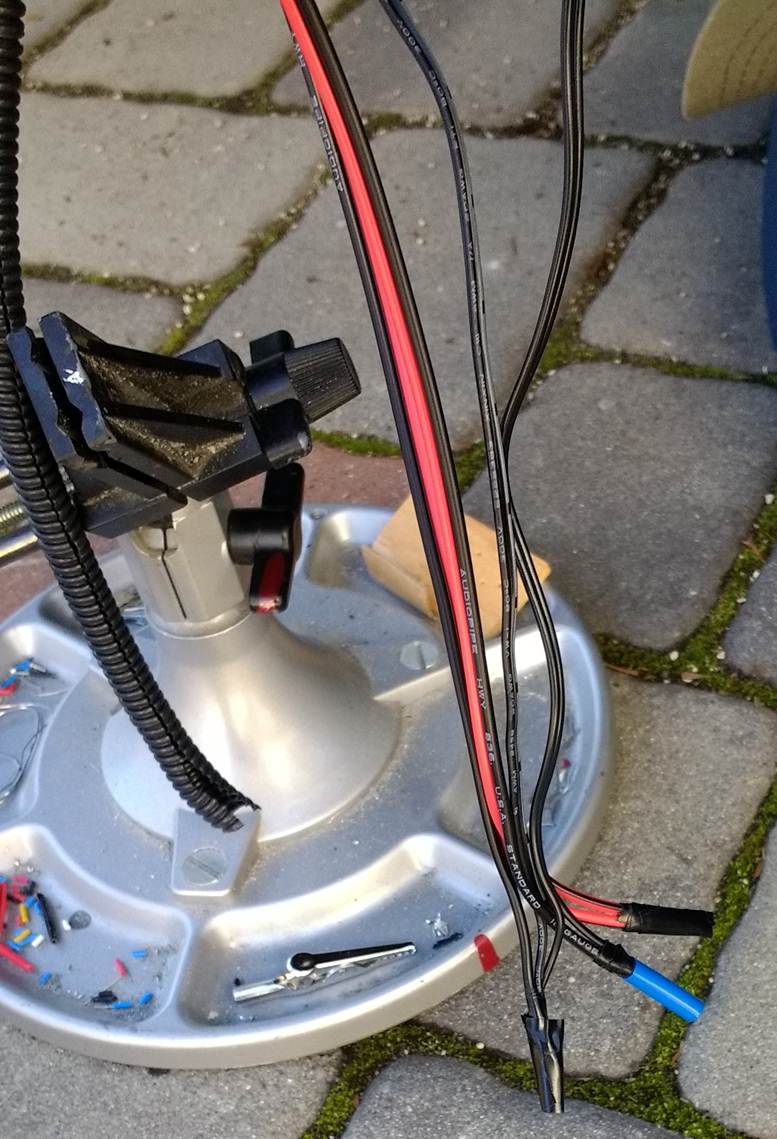
The lights are powered by the truck battery. For the next step, we’ll run a 12v connection back from the truck battery, including ground, using the 18 gauge 2 conductor wire.
First, prepare the 12v inline fuse.
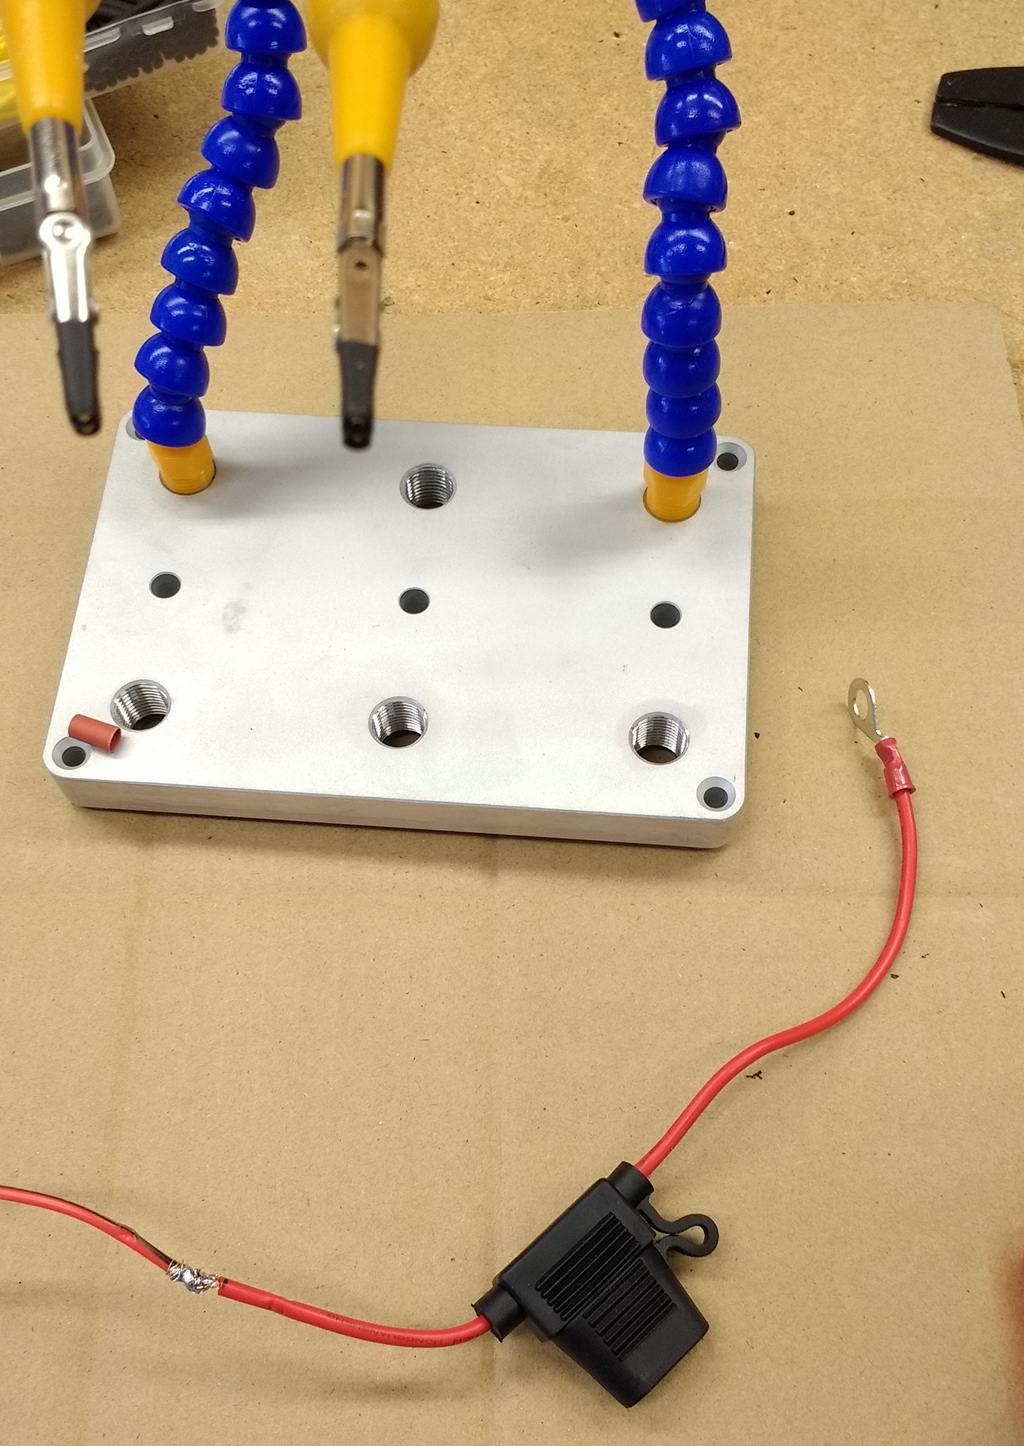
Attach a ring terminal on one end of the inline fuse. Attach the 18 ga wire to the other end and wrap with heat shrink tubing or electrical tape. I needed about 30′ of length here.
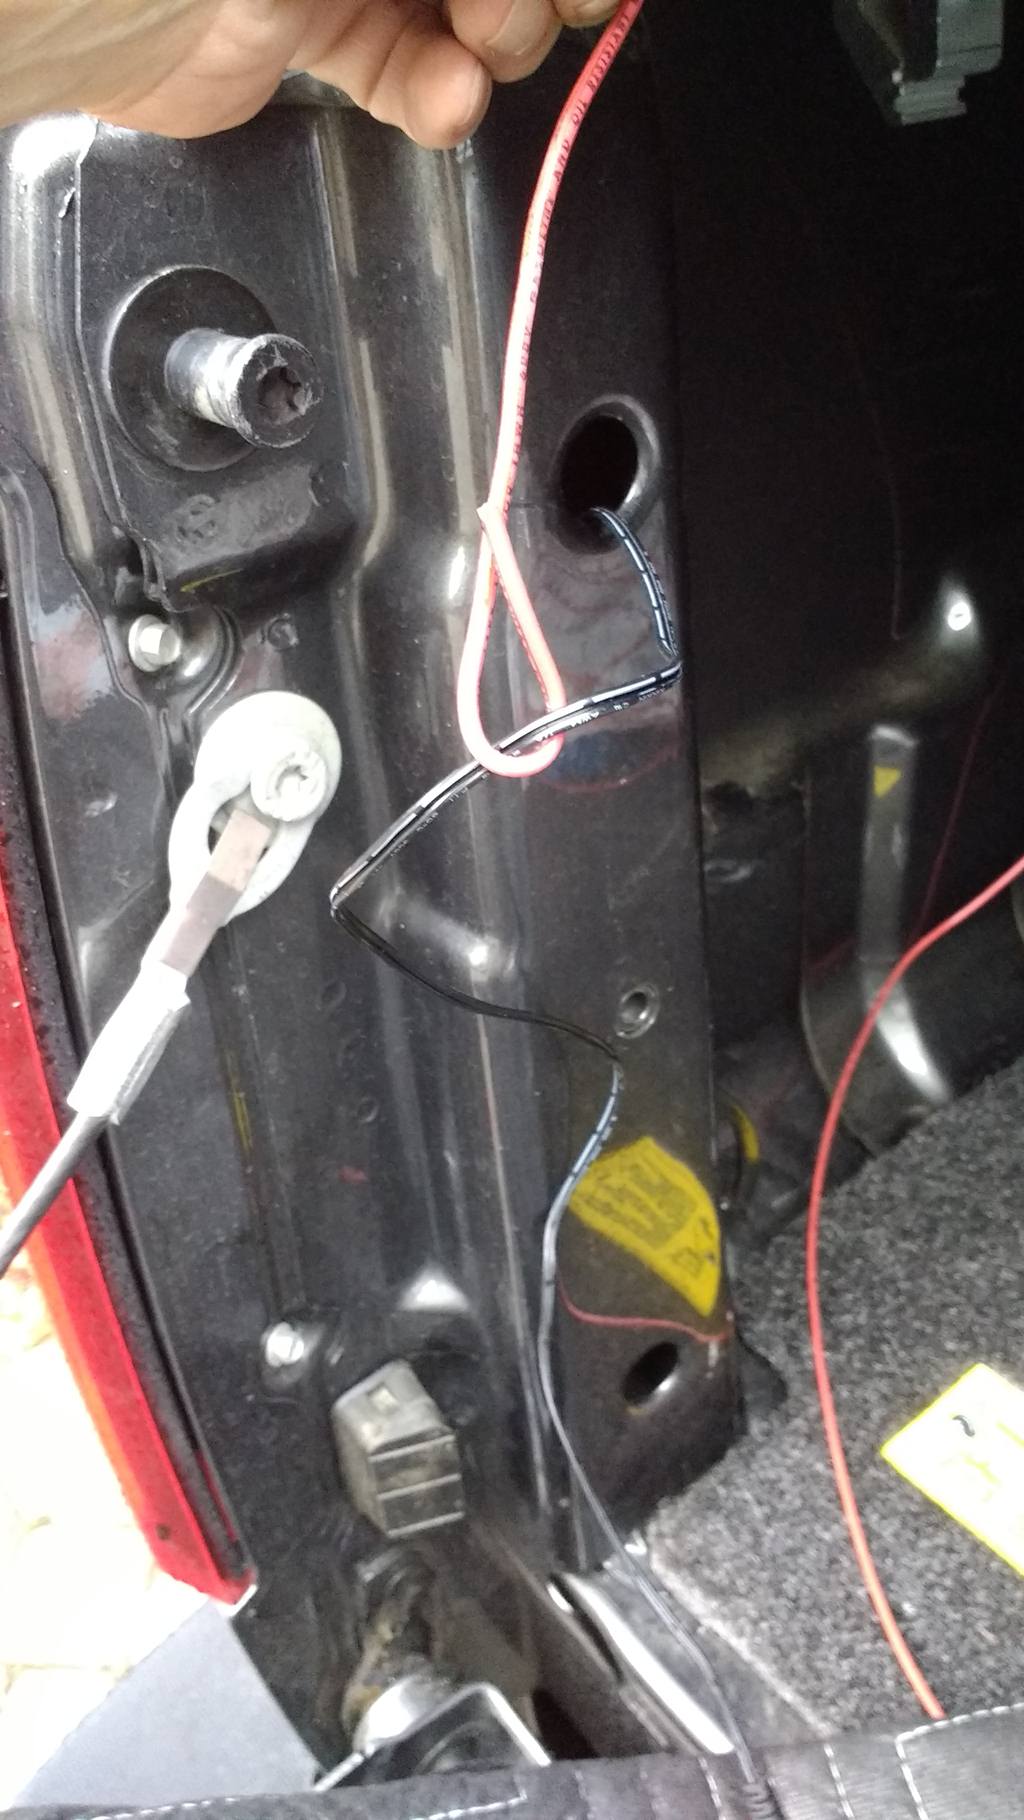
Attach a ring terminal on the ground lead as well. Attach the plastic loom to the long end and feed it up from the bottom on the battery side of your truck.
Remove the fuse for now so you don’t accidently short anything. Attach the ring terminals to the respective battery terminals. Add zip ties for strain relief. and then start routing the wire and loom down along the bottom of the chassis. Attach a generous number of zip ties along the way. Route it all the way to the back of the truck. I chose a junction point for all the wiring at the back, where there was a nice protected plenum for the bundle of wires coming from the 12v, left and right side LEDs, and the on/off switch. For now, leave this end alone to be connected up shortly.
LED Power Harnessing
To attach the 2.1mm extension cables to the LED strips, find the best openings you have in the back area of your bed to route the leads.
For my F250, I found it easier to fish the 2.1mm line up from the bottom, first pulling it out the side hole shown using some solid gauge wire, then doing another pull from a hole in the back. Then connect the plug to the LED strip. Route the loose end (bottom) along the chassis to your chosen junction point.
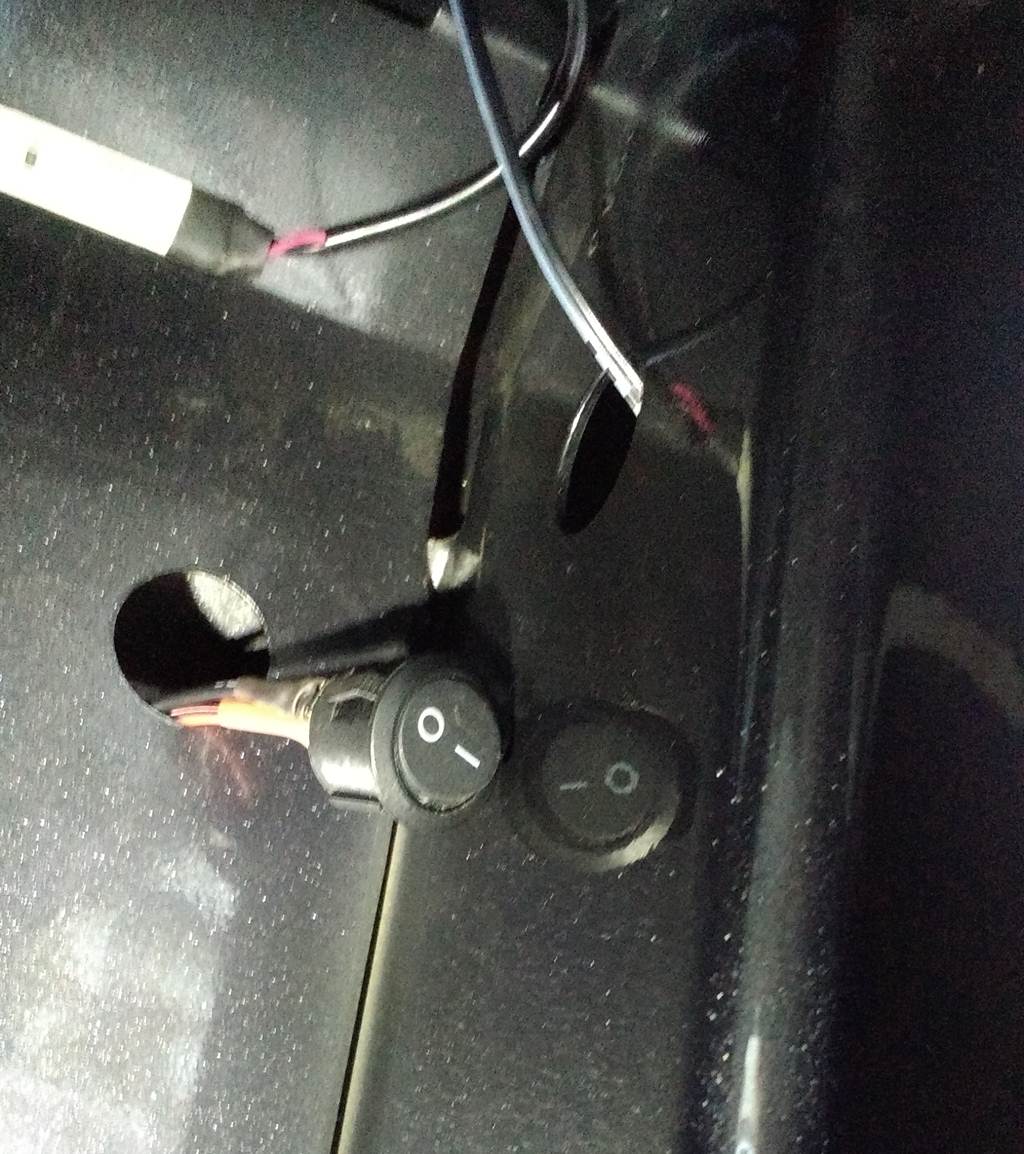
On/Off Switch
I chose to mount the on/off switch just inside the end of the bed on the passenger side, where it would be easy to reach with the tailgate up or down. Attach 3-4′ of wire to the switch and feed it through a convenient hole in your bed. The switch I chose fit nicely with the 1″ holes in my bed.
Final Hookup
At this point you should have all your wire pairs at your junction point:
- 12v power and ground from the battery
- On/Off switch – 2 wires
- Passenger side LED strip
- Driver’s side LED strip
Cut off the excess ends and connect as follows:
- 12v power to one of the switch wires
- The other end of the switch is joined to the positive/12v leads for the LED strips
- Connect battery ground to the LED strips
Now try it out!
For final cleanup, take the bundle of wires and tie wrap them in the frame underneath the bed.