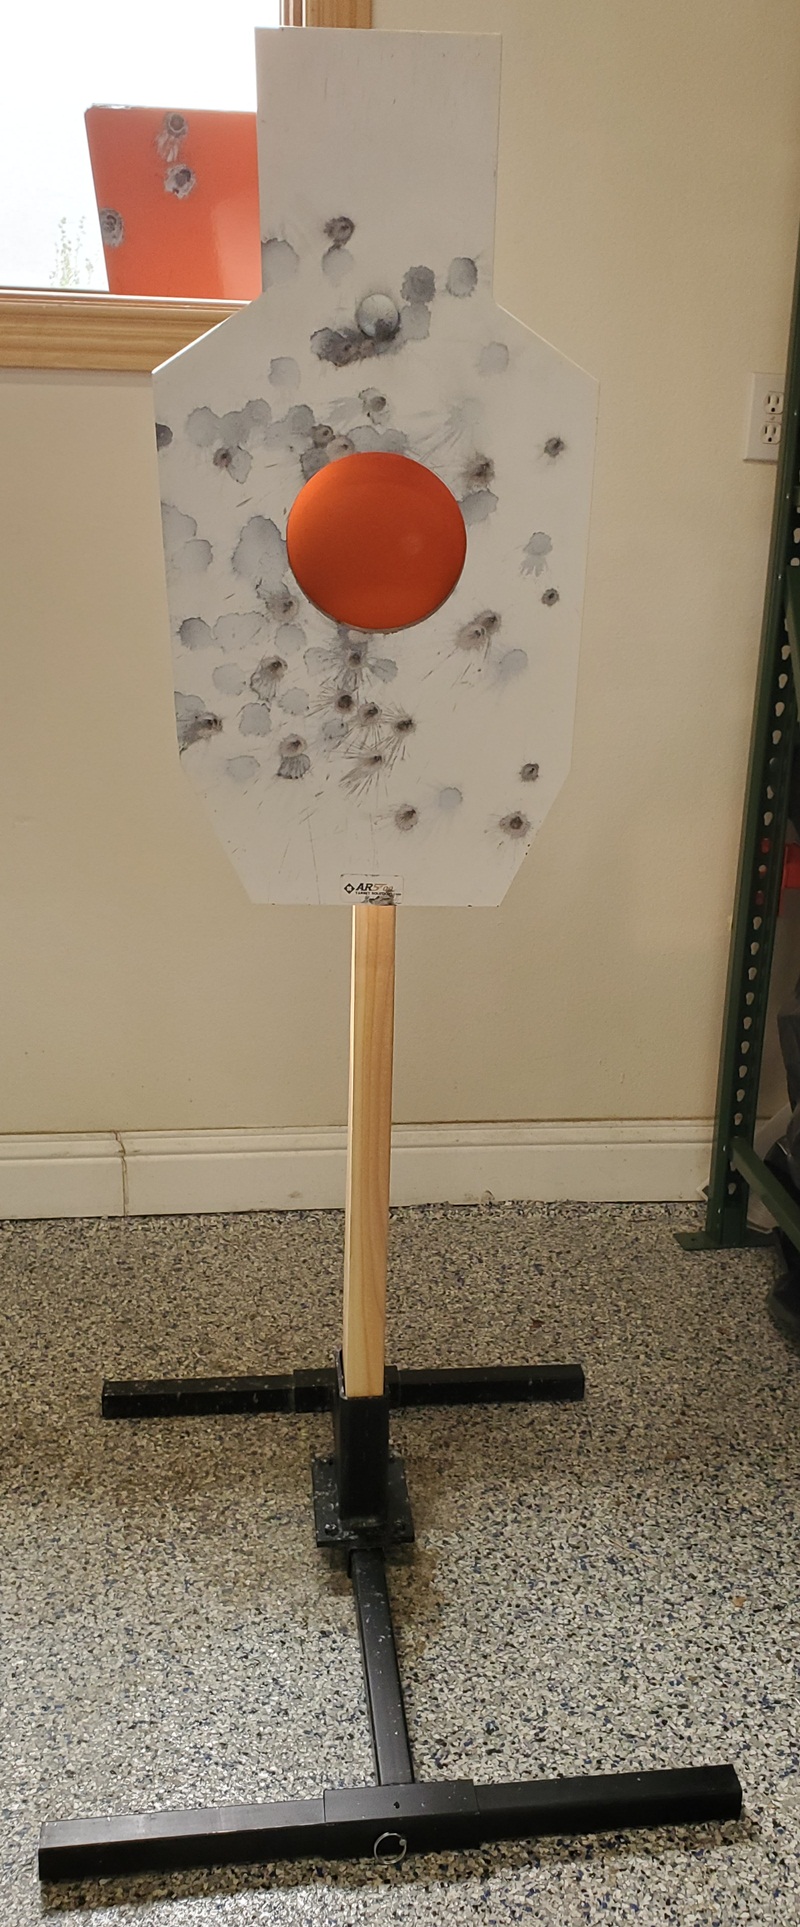
Shooting steel is a ton of fun. Storing, transport, set up, and tear down…not so fun. This post is about the the design of my target stands to make things easier. The IPSC is from the good folks at AR500 Target Systems.
The Goals & Requirements
1. Quick set up and tear down. I wanted tool-less set up, no wrenches to remember to bring. Further, minimize the potential for parts to get lost/mis-placed.
2. Storage – ability to break the stand down into pieces to store efficiently in their own crates in the garage and during transport. I really dislike stands that are bolted together as a single piece that is unwieldy to put away.
3. Support for a variety of targets. IPSC plates can be quite heavy. A dueling tree with tilt is both heavy and front loaded.
4. Easy fabrication – ideally something that can be built in a few hours.
The Approach
I standardized on a 2×4 mount as mounts are readily available and 2×4’s are low cost sacrificial items.
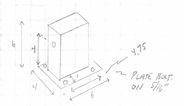
The mount consists of 4″ x 2″ rectangular tube 1/4″ thick, 6″ tall, welded to a mounting plate that bolts to the base.
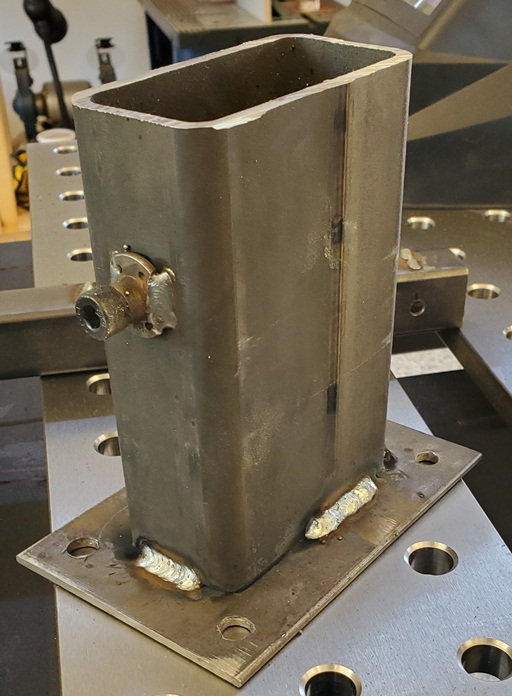
I used a weld nut as a tensioner for the 2×4.
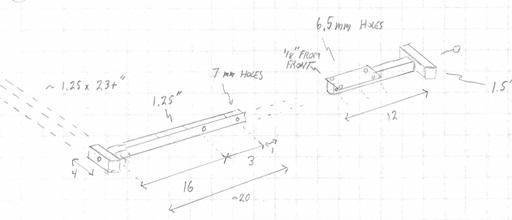
For the base, the concept I settled on is to use 1.5″ and 1.25″ square tube, with the latter telescoping in as removable sections.
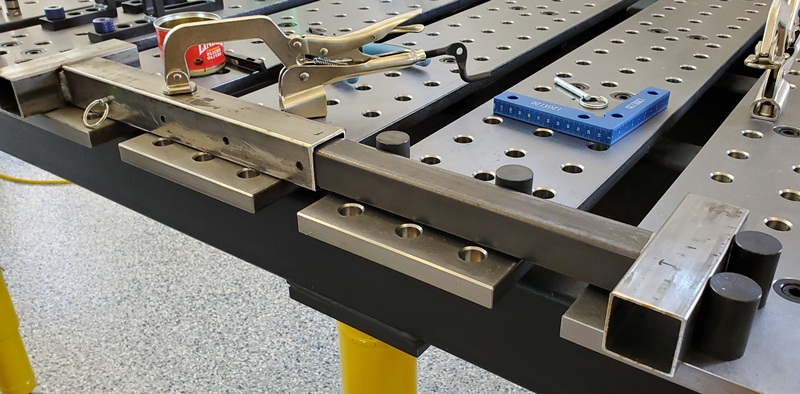
Note that the front section can telescope out to different lengths depending on the center of mass of the steel target that is mounted. A 1/4″ pin is used to secure it, allowing quick, tool-less setup and take down.

To make for a snug fit on the telescoping, I laid a couple of weld beads across the 1.25″ piece.
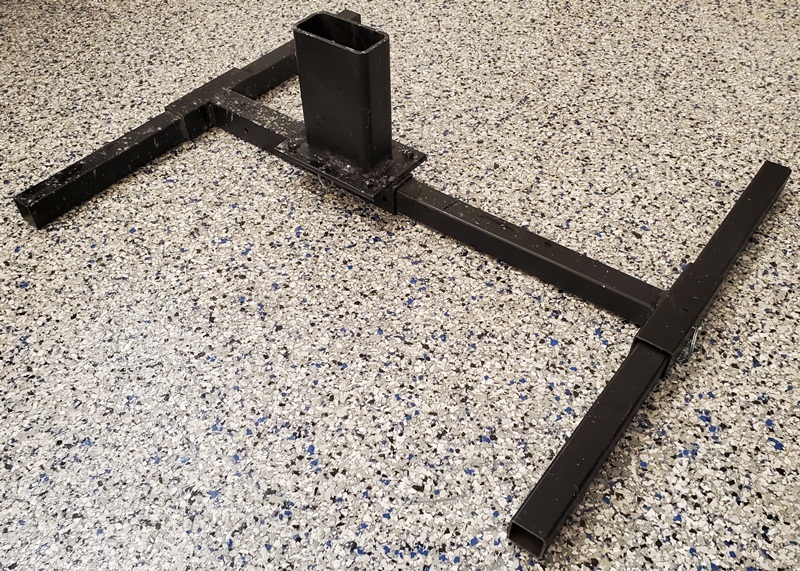
Here is the finished assembly, with the mount bolted to the base. Note the use of pins for the front and back legs too.
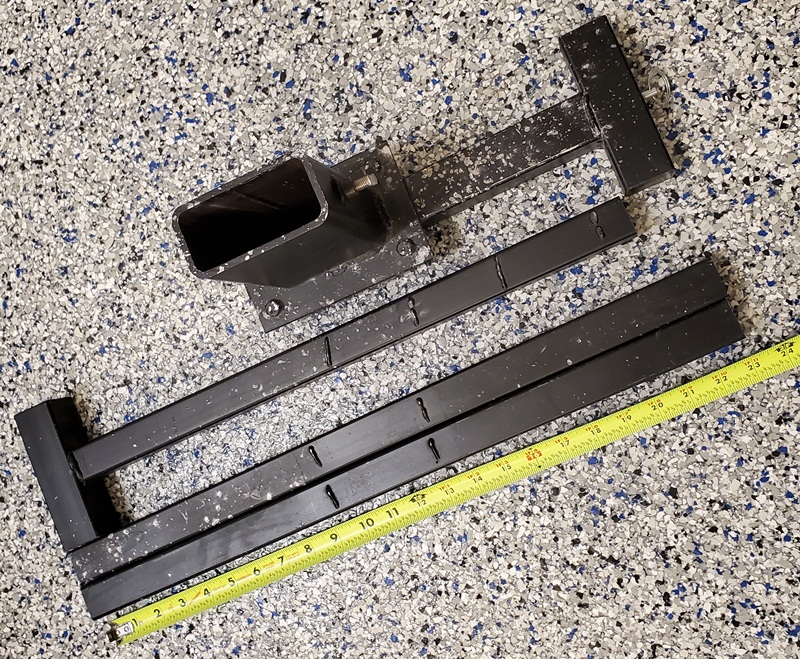
Setup and take down is fast, and the pieces fit nicely in my 24″ long custom wood crate.